HOUDINI BLOG
MY JOURNEY INTO HOUDINI
PDG AND TERRAIN TOOLS
08 november 2019
Houdini Indie
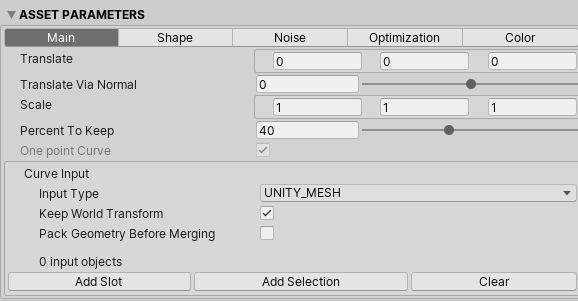
By now I have bought Houdini Indie which means that I don't have any limits anymore in using the software. Plus I can use the Houdini Engine plugin for Unity to test my hda's in. About my experience in it, 1 word, amazing! I totally recommend buying it. The software is available on the website of SideFx, but it is computerbound. If you buy it on steam, it's not. Can be handy if you buy a new pc to transfer the license!
PDG
Procedural Dependency Graph or PDG is a tool of Houdini to fasten up pipelines. It is designed to distribute tasks and manage dependencies to better scale, automate, and analyze content. The power of PDG lies with parallel execution of tasks with multiple cpu cores and cooking outputs. PDG can be used in a TOP network (Task Operators).
Can be used for:
- generating cities (when rebuilding only update the changed houses = faster than full rebuild of all houses (cooking))
- creating quick variations of objects and exporting them to a folder
- splitting up big pipelines into a more readable network
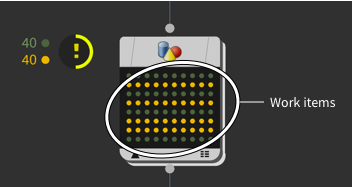
Work Items:
Each node in a top network generates 1 or more "work items". A work items could be seen as a job (script or hda that is processing a result). The number of work items are represented by dots. The result of each dot/workitem can be viewed by clicking on the dot. The dot also has a certain color, which tells you if the job has succeed or failed.
Attributes:
A work item contains attributes, similar to attributes on a point in geometry. Attributes are passed down to work items created from "parent" work items, so you can use them to have the result of a work item affect the processing of its child items. The following paragraph will explain it more in detail with an example.
Wedge Node:
One of the most basic and frequently used nodes in TOP. It is used to generate random values. which can be used to generate variations of an asset. These values represent attrubutes.
HDA Processor Node:
Cooks a hda and writes the asset's output to a file. F.e. using the wedge node to generate different height attributes to then generate buildings with different heights with the hda processor node.
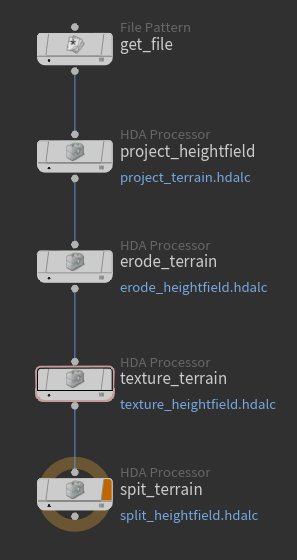
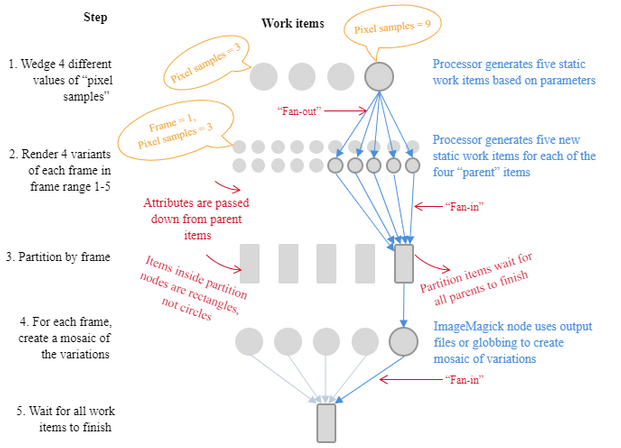
An example of using the hda processor node
Simplified example - SideFx Website (https://www.sidefx.com/docs/houdini/tops/intro.html)
The simplified illustration on the right depicts a basic network to render out five frames of an animation at different quality levels, and create mosaics of the same frame at different qualities, so we can understand how the quality setting affects the final image.
-
A Wedge node generates four "dummy" work items containing wedge variants (for example, different values for Mantra’s Pixel Samples parameter).
-
Append a ROP Mantra Render node and set the frame range to 1-5. This generates 5 new work items for each "parent" item. The wedged attribute is passed down to the new work items.
-
A Partition by Frame node creates new "partition" items with dependencies on the work items with the same frame number. This makes the partition wait until all variants of the same frame are done before proceeding to the next step.
-
An ImageMagick node generates new work items to take the rendered variants of each frame and merge them together into a mosaic image. Of course, we could do more like overlay text on the image showing what settings correspond to each sub-image in the mosaic.
-
A Wait for All node at the end generates a partition item that waits for all work to finish.
This lets you add work items after the "wait for all" that only run after all the "main" work is done. This is where you would put, for example, post-render scripts and/or notifications to the user that the work is done.
PDG - My part in it
I've tried out some things with PDG and Unity so I have an understanding of how to use it and what is does. This was a very interesting topic because I've learned how to work with terrains/heightfields and pdg in one go.
Heightfield painting tool
When using heightfields with PDG I thought about the simple comination of using heightfields together with photoshop. The only thing I must do was painting a shape, save the png, import it in houdini and done. I took it to another level and added a tool that generated low poly cliffs where needed. A picture below to see an example.
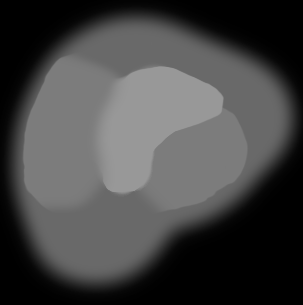
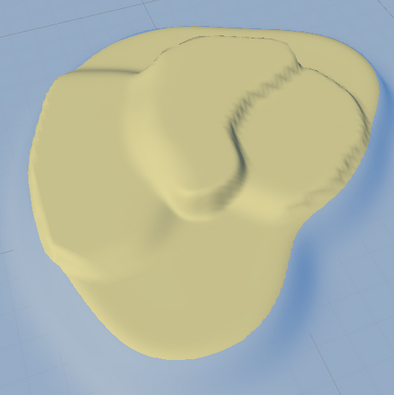

height painting in photoshop --> houdini --> unity
better view on the cliffs (generated with heightfield info)
I felt like I could do more with this so I added a tool where you can define a cliff via a spline. It has more control over the cliffs than with the previous tool. Since I was doing low poly style I researched more about the modeling process and the technical difficulties you can have with it.
I could go 2 directions with this:
1. vertex splitting without textures
- storing colors in the vertices
- splitting vertices of triangles so I can have flat shading (mesh of 75 vertices becomes mesh of 225 vertices, each triangle has its unique points instead of shared points = points x3)
- setting normals to face of primitive
- using a shader to display the colors
2. no vertex splitting with textures
- making a tool to translate the uv's to the correct color swatch index
- using a shader in unity to calculate the normals for flat shading
On this blogpost Matias N. Goldberg explains what's the difference in performance in vertex count vs triangle count:
http://distantsoulsdev.blogspot.com/2013/02/polycount-vs-vertex-count.html
I chose for the first option. If I chose the second option, every triangle would have a seperate uv island because most of the shared uv triangles would have another color. If my mesh would have the 1 unified color then I would have chosen for the second option.
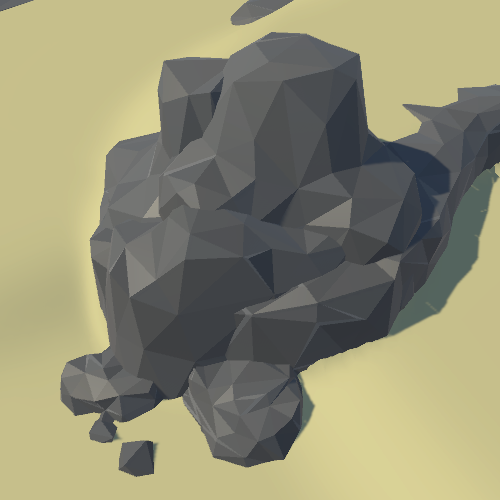
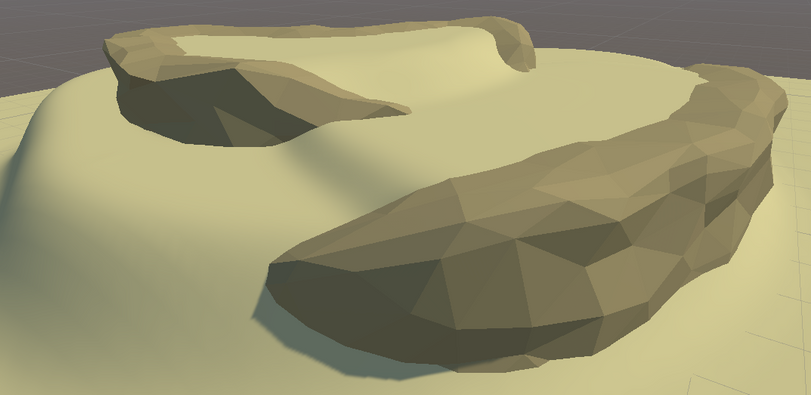
This is the result of multiple rocks combined. It's possible to generate infinite variations of a rock. I optimized the tool that it can delete all the (inside) faces you will never see in game because of the meshes combined. This is a common problem, but with houdini it can be fixed!